Your step-by-step guide to going from blank page to pro site — fast.
✨ Imagine this…
It’s Sunday night. You’ve finally decided to build that website — for your new side hustle, your business, your personal brand.
You grab your laptop, pop open WordPress, and… stare at a boring blank page. Or worse, some clunky default theme that looks like it’s from 2012.
You want something polished, something that screams professional, something that makes people think:
“Whoa, did they hire an agency for this?”
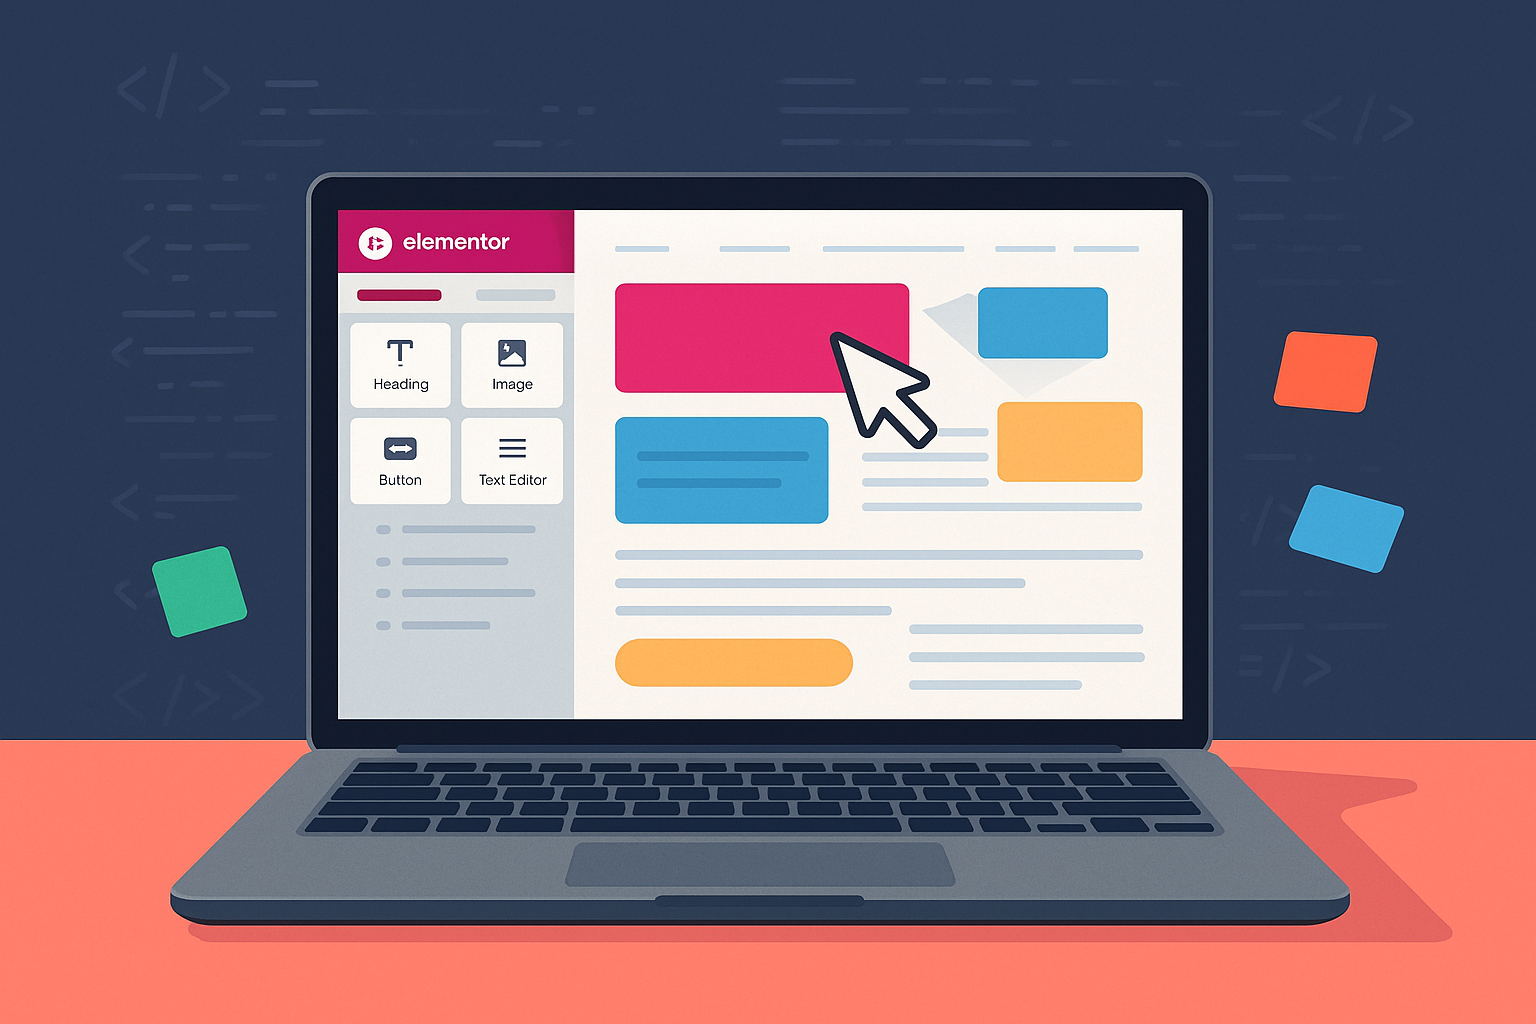
That’s where Elementor comes in — the world’s favorite drag-and-drop WordPress builder that lets you create drop-dead gorgeous websites without writing a single line of code.
But before you dive into Elementor’s playground of widgets and wow-factor animations, there’s something you absolutely need first.
🏠 Stop! Before Elementor, you need hosting (aka your website’s home)
I’ve seen so many beginners try to jump straight into designing with Elementor, only to realize…
👉 “Wait, where does my site actually live?”
If Elementor is your interior designer, then hosting is your actual house.
No hosting, no WordPress. No WordPress, no Elementor. It’s that simple.
🔥 So where should you start?
Don’t worry — I’ve got your back.
I’ve written simple guides on the top hosts for beginners, so you can get your domain, hosting, and WordPress live in less than 30 minutes.
✅ Start with Namecheap— perfect if you want an easy setup & free domain.
✅ Why SiteGround is worth it — blazing fast, amazing support.
✅ Launch with Hostinger — tight budget? This is your best bet.
Pick one, follow my step-by-step posts, and you’ll be up and running tonight — with WordPress installed and ready to go.
👉 Not sure which to pick?
I break it all down in my full Namecheap vs SiteGround vs Hostinger comparison — costs, speeds, support, the whole deal.
Once you’ve followed one of those guides and installed WordPress, come right back here. That’s when the fun begins.
Then come right back here, because that’s when the real fun starts.
🎨 Now it’s Elementor’s time to shine
So you’ve got WordPress set up (nice job!).
Now you’re ready to transform that plain canvas into a site that looks like you dropped thousands on a custom design.
In this guide, I’ll show you exactly how to:
✅ Install Elementor in 2 minutes flat
✅ Build your first stunning page section by section
✅ Tap into Elementor’s new AI tools to speed up writing & visuals
✅ Make sure it looks flawless on mobile
✅ And hit publish on a site you’ll actually be proud to show off
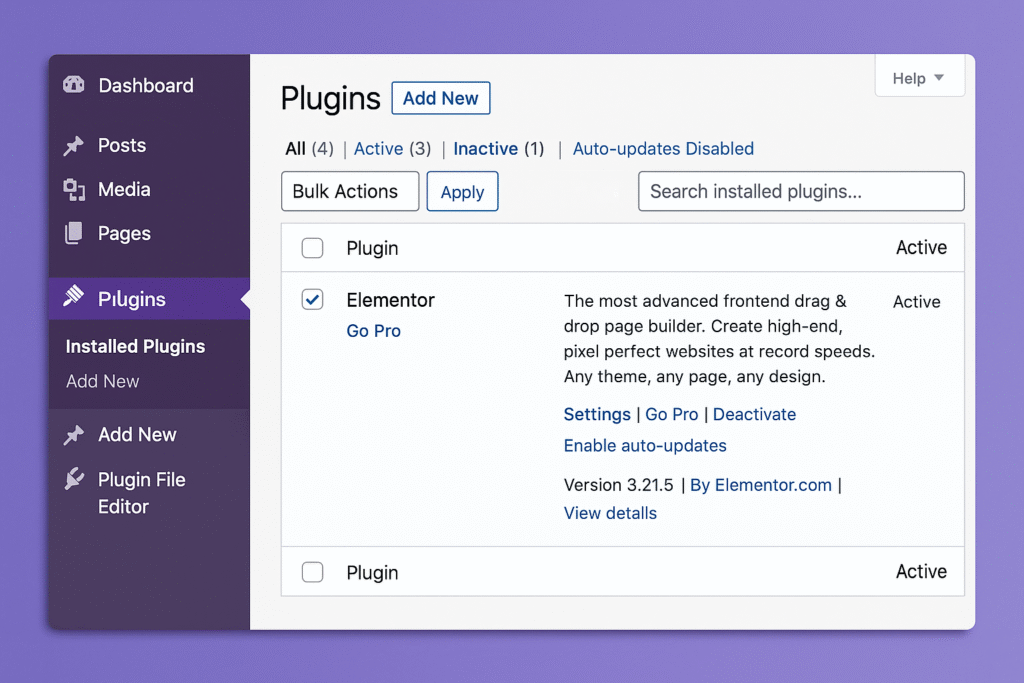
🛠 Step 1: Install & Activate Elementor
Alright, let’s get to work.
- Log into your WordPress dashboard (yourdomain.com/wp-admin).
- On the left sidebar, click Plugins > Add New.
- Type “Elementor” in the search bar.
- Click Install Now, then Activate.
🎉 That’s it. You now have the world’s most popular page builder loaded up.
No code. No hassle.
🌟 Step 2: Create your first page (and open the fun zone)
- Head to Pages > Add New.
- Give it a name — maybe Home, About, or What I Do.
- Smash that big blue “Edit with Elementor” button.
Boom.
You’re now inside Elementor’s live editor, where the magic happens.
- On the left, you’ll see all your widgets — text, images, videos, buttons, icons, forms.
- In the main window, you’re literally looking at your site. Every tweak happens live.
No more hitting preview a thousand times.
Change something. Watch it update instantly.
✍️ Step 3: Build your first beautiful section
Alright, let’s break down how Elementor works:
👉 It’s all about Sections > Columns > Widgets.
Structure | What it does |
Section | Big horizontal row across your page |
Columns | Splits sections into parts |
Widgets | Your actual content (text, images) |
➡ Example: A killer hero banner
This is the top section people see first. Let’s make it pop.
- Click the big “+” icon to add a section.
- Pick one column for a clean, full-width look.
- Drag a Heading widget into it and type:
Welcome to Adam Tech Guide
- Underneath, drop a Text widget. Something like:
Honest tech tutorials and guides to grow your business.
- Add a Button widget. Change it to “Get Started”, and link it to your contact page or best article.
🎨 Make it yours
Click the section handle (the little blue tab at the top).
- Under Style > Background, pick a striking image or gradient.
- In each widget’s Style tab, tweak fonts, colors, spacing.
- Center everything under Layout > Column Alignment.
And guess what? You’re seeing it all live. No more “hope it looks good when I hit update.”
📱 Step 4: Make it mobile-perfect
Click the Responsive Mode icon at the bottom (looks like a monitor/tablet/phone).
Flip between Tablet and Mobile views to tweak fonts, margins, padding, even hide certain sections.
Over half your visitors will be on their phones. This is how you make sure they think:
“Dang, this looks amazing.”
🤖 ✨ New for 2025: Elementor’s built-in AI tools
You’re gonna love this.
Elementor’s new AI is like having a junior copywriter and designer built right in.
🚀 What can it do?
✅ Magic Write
- Staring at a blank hero headline? Type a prompt, let Elementor draft it for you.
- Need bullet points? A quick product description? Boom, done.
✅ AI Image Tools
- Generate simple graphics or remove backgrounds — all inside Elementor.
✅ Smart design suggestions
- Warns you if your colors lack contrast, or if something’s awkwardly spaced.
No more “blank page anxiety.”
Your ideas + Elementor’s AI = beautiful pages faster.
🚀 Step 5: Publish and show the world
When you’re happy with how it looks on desktop, tablet, and mobile…
✅ Click the green Publish button.
✅ Copy that link.
✅ Or set it as your homepage under Settings > Reading.
Then take a second and admire what you built — because it looks legit.
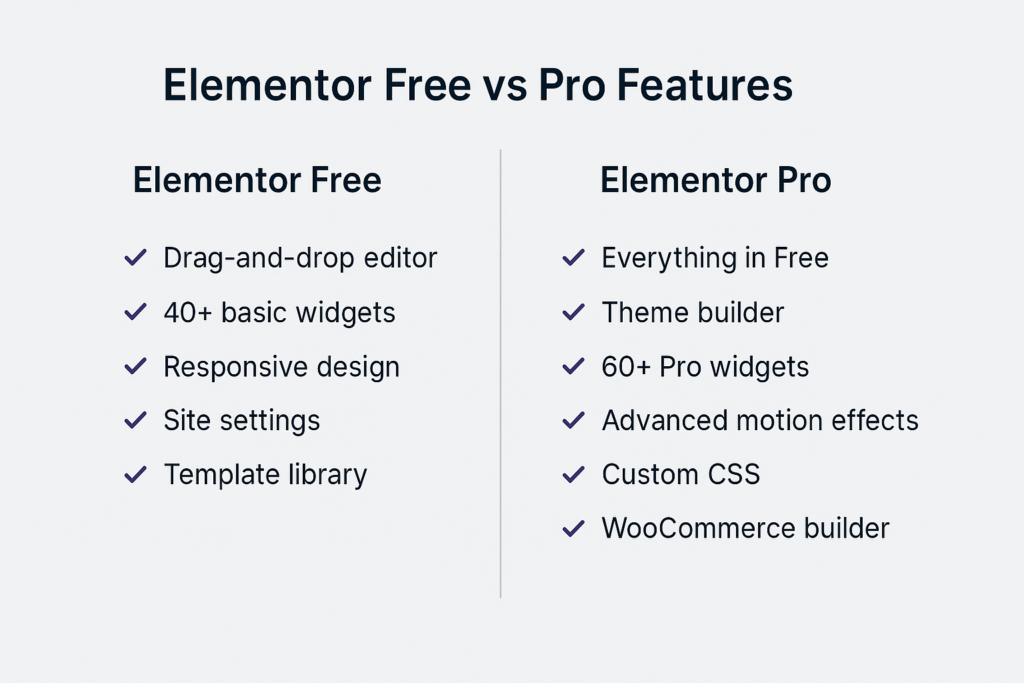
💎 Why upgrade to Elementor Pro?
The free version of Elementor is incredible. But if you’re serious about your brand or business, Pro takes it to another level.
✅ 90+ advanced widgets — forms, sliders, price tables, countdowns
✅ Popup Builder — grow your email list or promote flash sales
✅ Theme Builder — custom headers, footers, blog layouts, WooCommerce product pages
✅ AI fully unlocked — more words, more images, more creative magic
✅ Global widgets & custom CSS
👉 If you want to control every pixel and launch sites that look like they came out of a top agency — Elementor Pro pays for itself on day one.
👉 Try Elementor Pro here (insert affiliate link).
🔥 Pro tips from Adam Tech Guide
✅ Pick a lightweight theme (Hello Elementor, Astra, GeneratePress) for speed.
✅ Set global fonts & colors under Site Settings so your brand stays consistent.
✅ Optimize your images (use TinyPNG).
✅ Pair with a caching plugin (like WP Rocket) to keep load times snappy.
🏗 Bonus: Still need hosting?
If you skipped ahead and still don’t have a website live…
Go grab one. Elementor only works on self-hosted WordPress.
✅ Start with Namecheap — free domain, easy setup.
✅ Go pro with SiteGround — speed monsters.
✅ Try Hostinger — crazy affordable.
🎯 Ready to build your dream site?
Here’s the truth:
You could pay a web designer $5,000. Or you could do it yourself this weekend, exactly how you want, with Elementor.
So go grab your hosting, set up WordPress, install Elementor, and build a site that turns heads — and gets clients, subscribers, or sales.
I can’t wait to see what you create.